How to Use the Bead Loom
Lesson 1: Points, Lines, Rectangles
The Virtual Bead Loom simulates the same grid pattern as the traditional bead loom. Users place colored circles in columns (the Y-axis) and rows (the X-axis).
There are several tools for placing beads on the virtual loom. In each case you use the "tab" key or the mouse to move your cursor to the field for entering the coordinates, then you enter them, and then press the button for the shape tool. The point tool places a single bead:

The line tool places lines of beads. You specify the two endpoints of the line. Diagonal lines tend to be jagged, but resizing the grid can help that (see "Options menu" on next page).
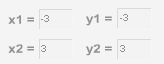
The rectangle tool fills in a rectangle of beads. You specify two vertices (lower right and upper left). The rectangles of this tool are always aligned with the axes.
How to Use the Bead Loom
Lesson 2: Triangles and Iterations
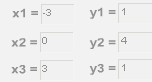
The triangle tool fills in a triangle of beads. You specify the three vertices.
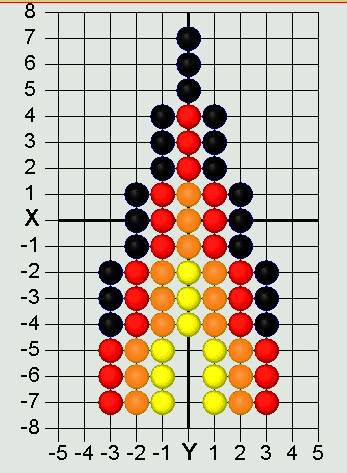
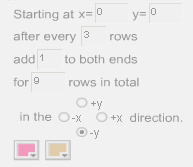
The iterative triangle tool: Our first triangle tool made jagged edges, while traditional beadwork has beautifully regular edges. We interviewed some native beadworkers, and found that their algorithms were iterative. The triangle iteration tool reflects this tradition of Indigenous mathematics. For example, the triangle in the beadwork at the top of this page was made by adding one bead on each side of the row, every three rows, as you go in the -Y direction.
- "Direction" -- determines in which direction your rows will accumulate
- "Starting at X,Y" -- that is the center of the starting row.
- "After every ___ rows" -- lets you determine how many rows you go through before adding more beads to the end.
- "Add ___ to both ends" -- the number of beads that will be added on each side of the center each time.
- "For ___ rows in total" -- how many rows you will bead in this triangle.
Note that this tool has two colors -- some traditional bead work shifts color in each iteration. This allows you to select the starting color and ending color; the software does the shifting for you.
How to Use the Bead Loom
Lesson 3: More Options
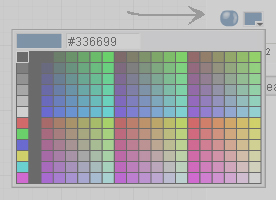
There are also controls that apply to all the tools. "Clear" deletes everything. Normally "Create" is selected, so that your tools will fill their specified shape with beads. "Remove" will erase all beads in the specified shape, so if you make an error use "undo" not "remove." The color button allows you to select the bead color. Clicking on the little square in the upper right of the screen will give you a list of all the colors you have selected so far. The "Save" menu allows you to save the work on your hard drive and edit the design later. Make sure your file name is only letters, not spaces or numbers, and that you go back to the same computer when you want to edit your work.
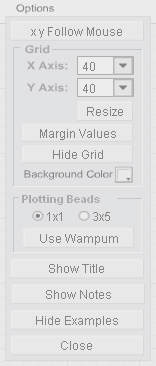
The "Options" menu allows you to resize the grid smaller or larger -- maximum size is 150 by 150. You can also change the location of the coordinate values, hide the grid, or create a title or notes about your design. You can also switch to Wampum beads, using either traditional 1X2 Wampum or a 1X1 Wampum (which is easier for math teaching--special thanks to Joyce Lewis of the Onondaga Nation for that concept!).
Printing: after you have your design completed, do a screen capture. In windows you can do that by pressing the "print screen" button on your keyboard, usually located at the upper right above the F10 key. On a Macintosh press shift + apple + 3 at the same time (also shift + apple +4 to select just a portion). That screen capture will save an image of the entire screen to your clipboard. You can then paste the clipboard image into a blank canvas in Word, Photoshop, Imaging (comes free in the "Accessories" folder in Windows) or other image editor.