pH Probe Calibration
Materials List:
- pH probe and Arduino setup
- Windows PC (Laptop)
- 4 paper cups
- pH 4.00 calibration Solution
- pH 7.00 calibration Solution
- pH 10.00 calibration Solution
- squirt bottle with water
- probe storage solution
Step 1:
From the Windows Desktop, double click on the Arduino IDE icon.
*If you don't have the Arduino IDE on your computer, click here to download a version for your computer.
Step 2:

The Arduino IDE (Integrated Development Environment) will start.
Step 3:
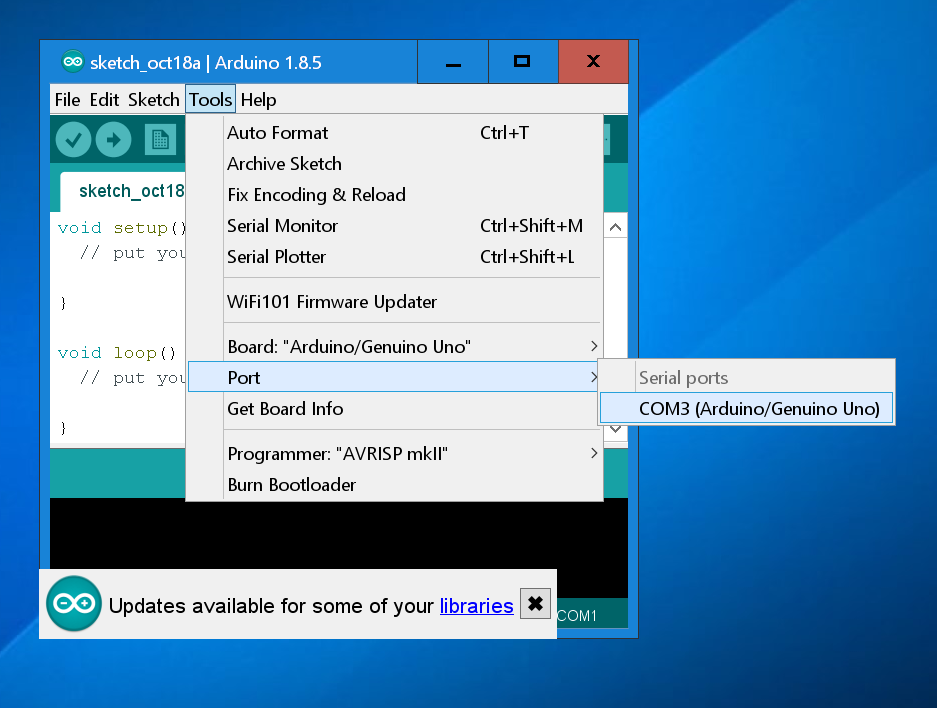
We need to select the "Port" on the computer that should be used to receive data from the pH probe and Arduino. Click on the Tools menu at the top of the IDE, then click on "Port". The computer should show a list of ports with one of them indicating that the Arduino is attached. In the picture, this computer found the Arduino attached to the COM3 communications port. Click on the correct COM port for your computer and a checkmark will show that it is selected.
Step 4:
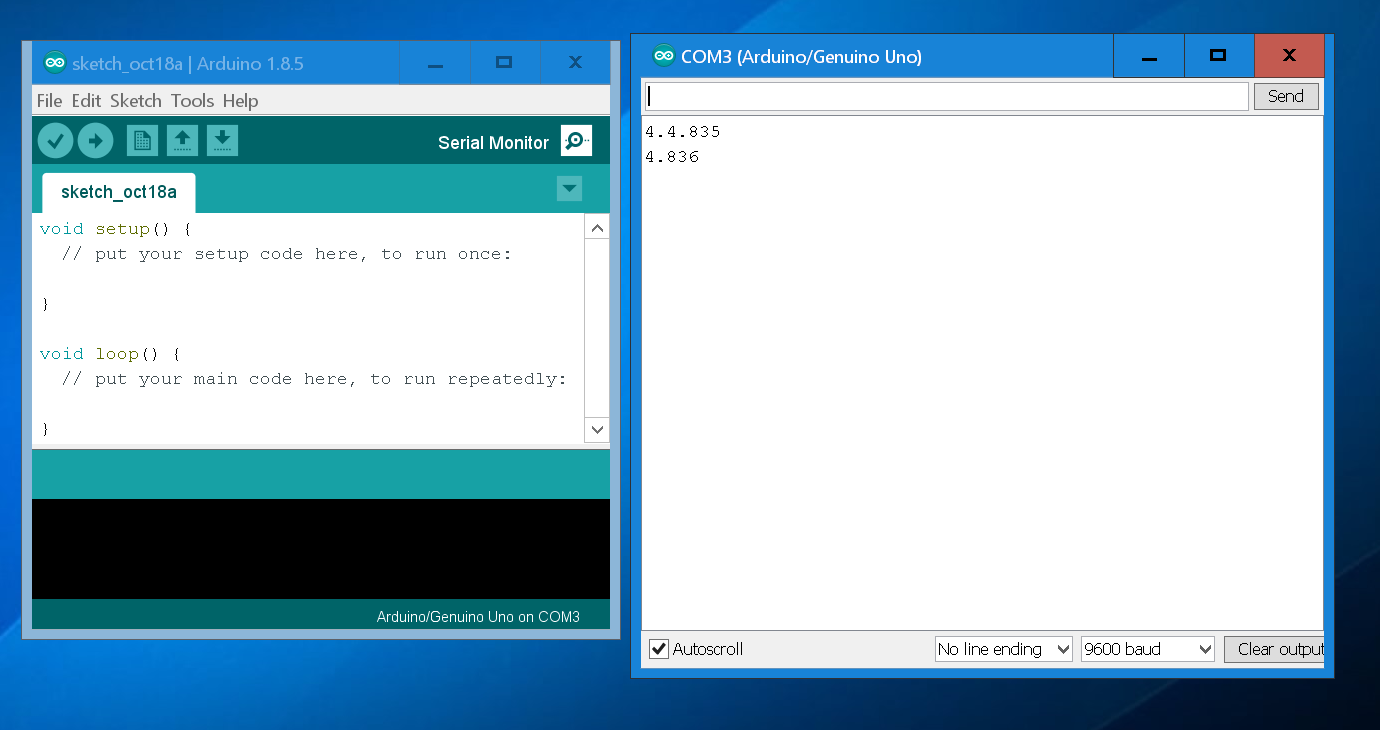
Click on the Serial monitor (the magnifying glass icon in the upper right of the IDE) and the serial monitor window will open. You will see pH values start to show up in the box, this is an indication that your pH probe is functioning properly and sending information to the Arduino. If you do not see values showing up in the box, double check that the COM port that shows "Arduino" has a checkmark next to it from step 2.
Step 5:
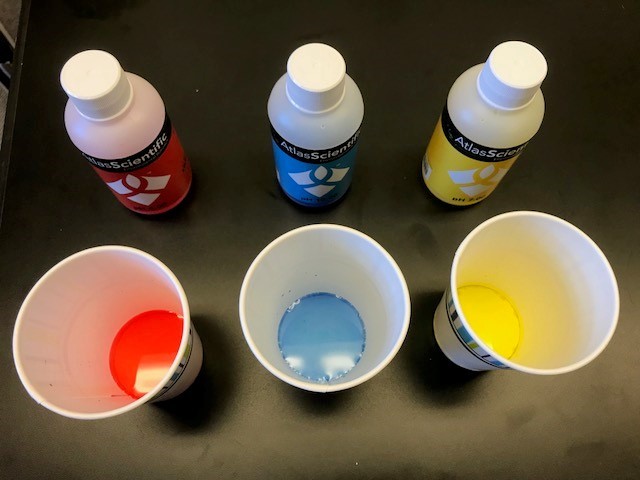
Prepare calibration solutions for testing the probe:
- Safety first! Put on your safetly glasses and lab coat.
- Arrange 3 paper cups in a row on your desk.
- Open the calibration solution for pH 4.00 and pour some of the liquid into the first paper cup.
- Open the calibration solution for pH 7.00 and pour some of the liquid into the second paper cup.
- Open the calibration solution for pH 10.00 and pour some of the liquid into the third paper cup.
- Insert the end of the pH probe into the first paper cup (pH 4.00) and watch the readings in the serial monitor window on your computer. The readings should start to move toward 4.00. However, they probably will not be exactly 4.00. We need to tell the Arduino that the current amount of Hydrogen Ions it is sensing is equal to a pH of 4.00. Type the following into the box at the top of the serial monitor, then press enter:
Step 6:
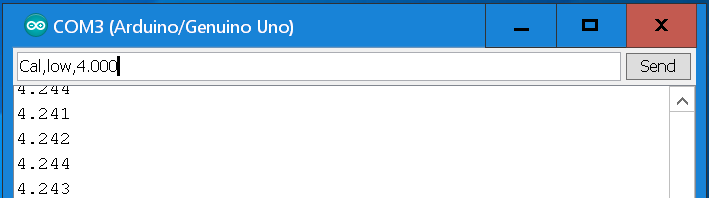
Cal,low,4.000
Step 7:
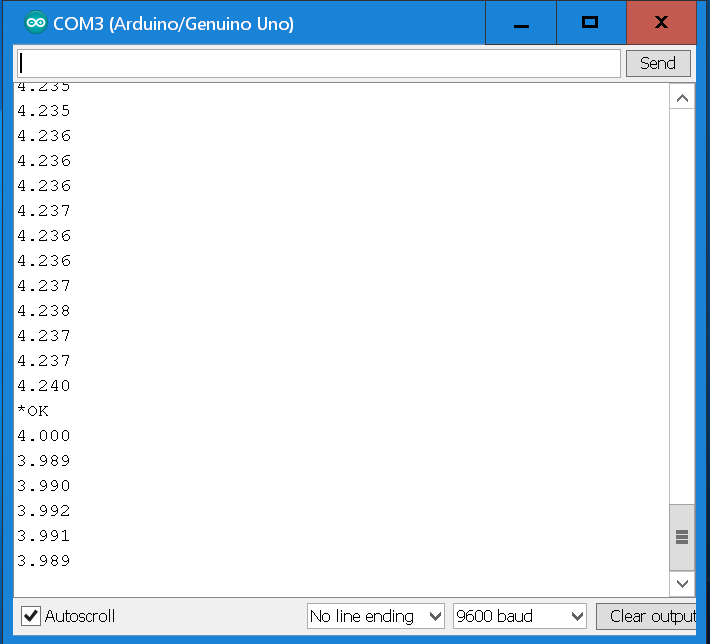
The word "OK" should show up in the list of readings in the serial monitor box and the pH values being reported should now be at or very near 4.000:
Step 8:
Rinse the end of the probe with water from the squirt bottle into the 4th paper cup and repeat the process in (f) for the 10.00 pH calibration solution and the 7.00 pH calibration solution, rinsing before each liquid.
To tell the Arduino that the current amount of Hydrogen Ions and Hydroxide Ions it is reading is equal to 10.00 pH, enter this into the top box of the serial monitor, then hit return:
Cal,high,10.000
To tell the Arduino that the current amount of Hydrogen Ions and Hydroxide Ions it is reading is equal to 7.00 pH, enter this into the top box of the serial monitor, then hit return:
Cal,mid,7.000
pH Visualizer:
Congratulations, your pH probe is now calibrated! Close the serial monitor and the Arduino IDE. You are now ready to move on to work with the pH Visualizer.
To install the probe, first install Node.js (
Windows
or Mac or
Linux). Then download the repository at
https://github.com/csdts/node-arduino by clicking the green
clone/download button and selecting "download zip." Extract it and go to this repo's directory in your
terminal/console and type "node @csdts/csdt-arduino.js -v color-scale". You can also install
node-arduino-visualizer globally (recommended) through npm with npm install -g @csdts/csdt-arduino then
typing csdt-arduino -v color-scale into console, which will run the visualizer. You can make a shell
script or a .bat with that terminal command (if you're on windows) and make a desktop link to it.