Lesson 1: Introduction
By now, you know how to create a braid using three geometric concepts: translation, rotation, and dilation. This tutorial will explain how to position your braid, and how to create multiple braids.
So far you have learned to create a braid using iteration, so every plait was changed a little from the plait before it. A dilation shrank each plait, a rotation rotated each plait, and a translation moved each plait.
Unlike the iteration that affected each plait separately, the parameters for positioning your braid move the entire braid as one piece.
Lesson 2: Starting Point
The first plait of your braid is outlined in blue. Its position is given by X and Y coordinates. Try moving your cursor over the centor of the first plait in the screen on this page. You will see the X, Y coordinates of the cursor. If you place the cursor in the center of the first plait, you will see its position is X=0, Y=0. You can enter in a new starting position by changing the X and Y coordinates in the box. Try it!
Challenge: move the braid to the upper right hand corner. What are the new starting position coordinates?
Lesson 3: Starting Angle
The braid in this simulation is going sideways, along the X axis. But the braid in this target image is going straight up. Try changing the starting angle so that your simulated braid is going straight up, like the target image braid. How is this different from the iterative rotation?
Lesson 4: Starting Dilation
The braid in this target image is very large. Try changing the starting dilation so that your simulated braid will be large enough to match the target image braid. How is this different from the iterative dilation?
Lesson 5: Starting Reflection
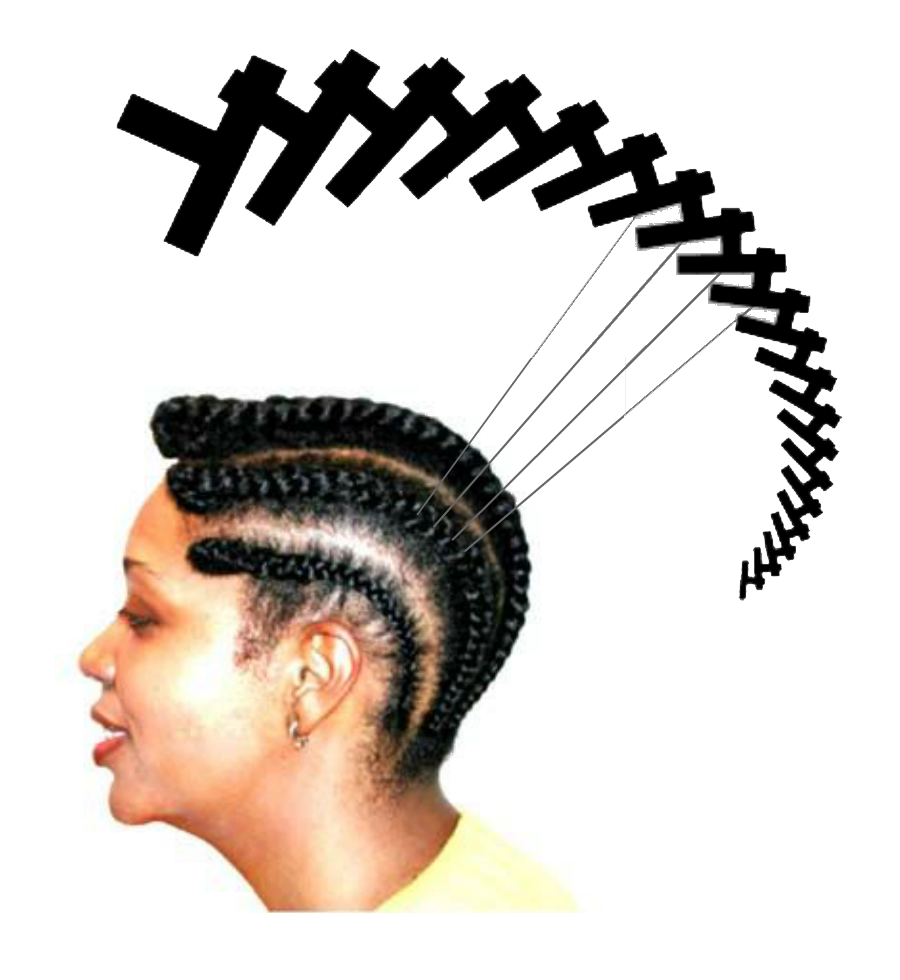
Reflection is a new geometric transformation for us. In reflection, we make a copy that is a mirror image of the original. Often, hair stylists will do reflections with the braids on each side of the head. Let's create a mirror image of the braid on this screen. The exercise will give us the chance to try some new features of the software.
First, click on the "add braid" button, and you will see that a new braid has been added with a starting position of X=0, Y=0. Now click on starting reflection across the Y axis. You will see that our braid flipped to the opposite side of the Y axis. But it doesn't look like a mirror image of the original braid. That's because the starting position of the copy was moved. Delete the braid by clicking on the "delete braid" button, and we will start again.
This time, go up to the "options" menu at top, and select "Add at Current Point." Now click on the "add braid" button - you will see nothing happen, because your new braid is right on top of the first braid. If you now click on starting reflection across the Y axis, you will see that our second braid flipped to the opposite side of the Y axis. Now we have a nice reflection of two braids.
Lesson 7: Next Steps
Congrats! You completed the tutorial. You can either: