How to Make an Aquaponics Systems
Materials
- 1 1/2" PVC
- 1 1/2" PVC Cap
- 3/4" PVC elbow joint
- 3/4 inch PVC Tubing
- PVC Cement
- Glue gun
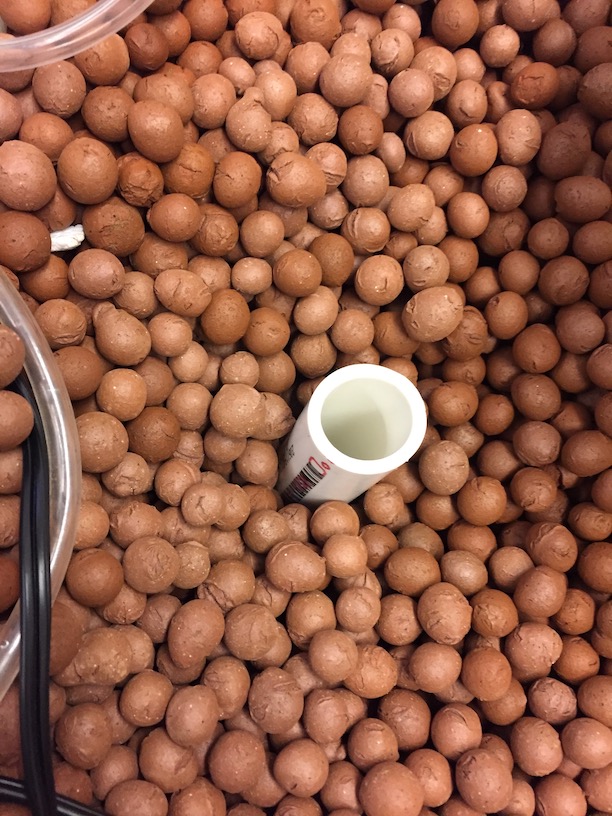
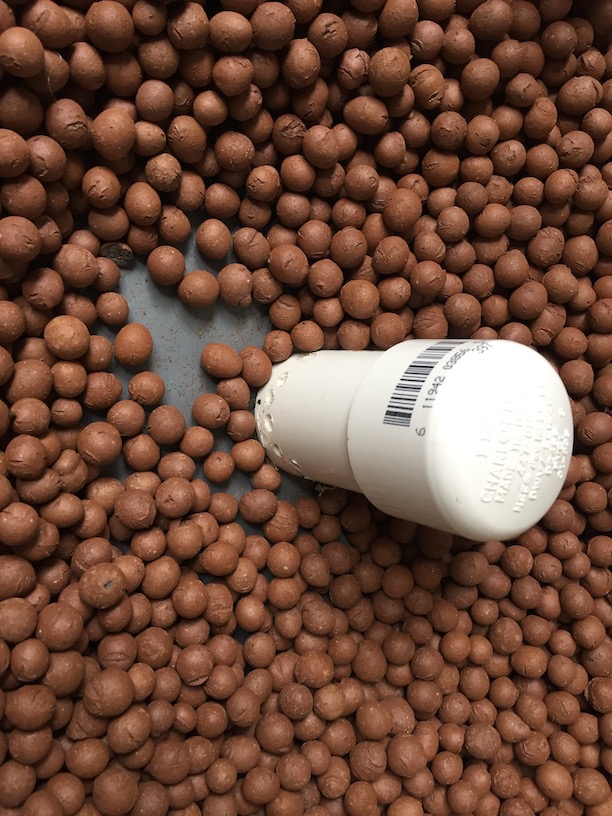
- Ceramic Ball Aquaponics Growth Medium
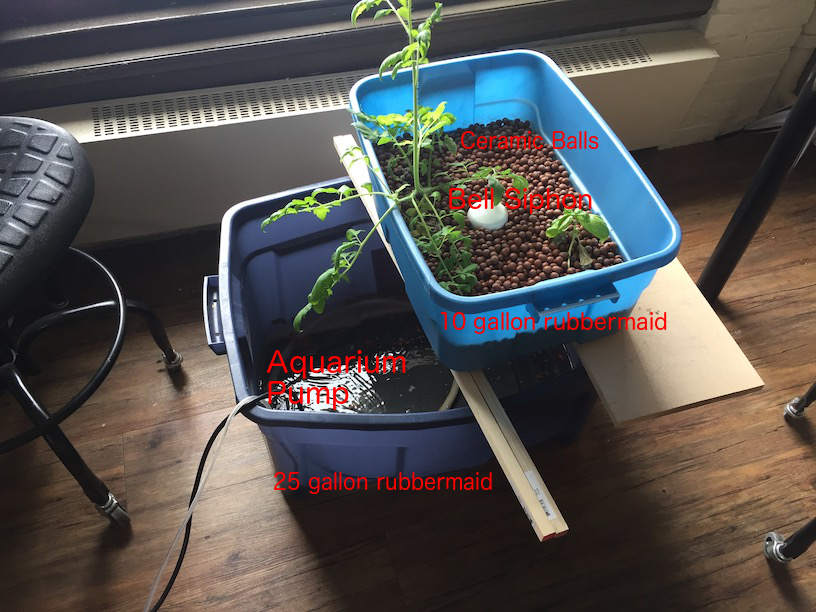
- 25 gallon Rubbermaid tub
- 10 gallon Rubbermaid tub
- ~80 gph fish tank pump
- Tubing to match your pump
Equipment
Saw to cut the PVC
Drill and Drill Bits (3/16", 1.05" spade bit)
Instructions
Set the 10 gallon Rubbermaid horizontally across the 25 gallon Rubbermaid.
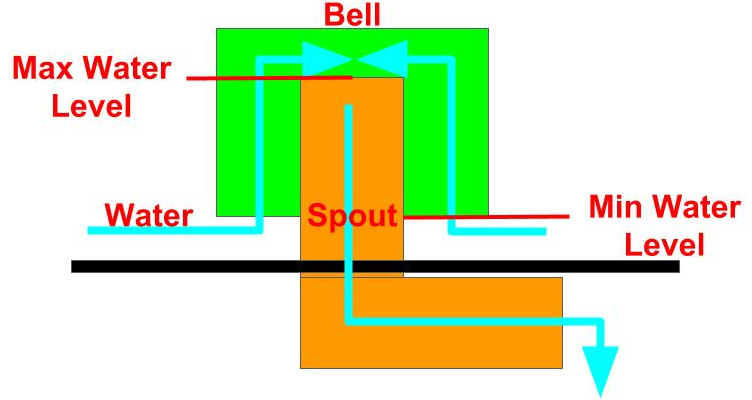
Cut the 3/4" pipe to length (height of growth media - 2" plus the length below needed to connect L joint). In our
system, it was five inches total of spout (with three inches of that sticking above the grow bed bottom and two inches
sticking below the bed). The lateral pipe was 3 inches total.
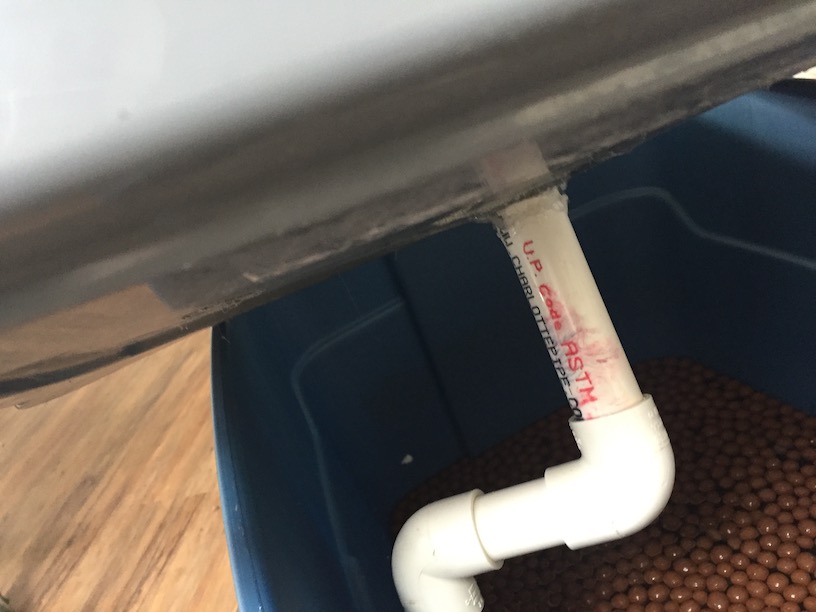
Drill a hole in the bottom center of the 10 gallon growbed (the OD of the PVC or 1.05") and insert enough PVC so that
it sticks up 3 inches from the grow bed bottom.
Seal the hole with a glue gun. Double check that it is water tight. No redos!
Add an elbow and lateral tubing (L joint) using the 3/4" PVC elbows. Make an elbow pointing downwards at the end of
the lateral tubing too. The reason for the right angle is that you need to prevent air from flowing back up. The
aeration is also important for the fish.
Get the 1 1/2" PVC tubing and cut to length (the height of the siphon sticking out + the diameter of the siphon ~ 1").
In our set up, that is 3 1/2". When cutting the bell, make sure the cut is perfectly perpendicular to the walls so it
won't be crooked when you rest it upright on the cut. PVC Cement on the 1 1/2" PVC Cap to one end. Make sure it is
air-tight.
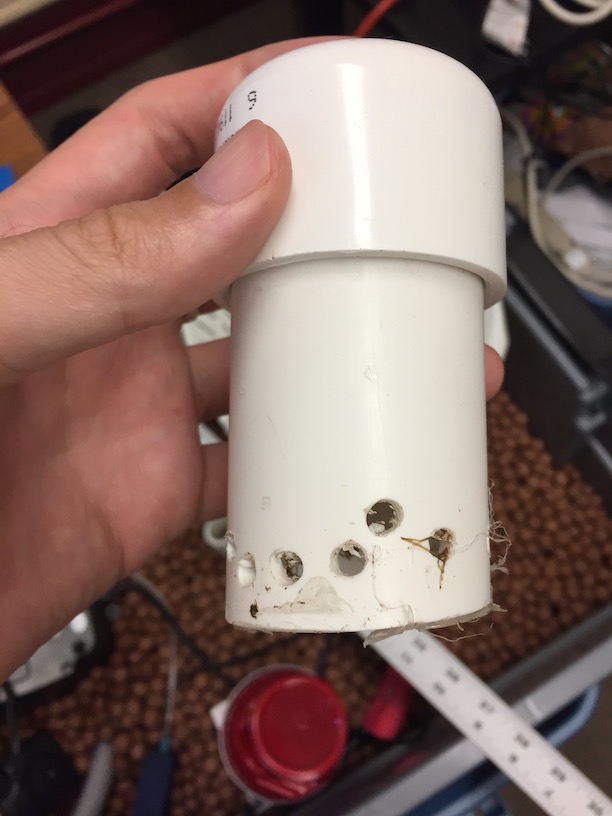
Drill small holes (3/16") around the base of the bell siphon outer PVC so that water can easily fill the cavity to be raised up then sucked up and out. Drilling holes is not the best way to make a bell siphon, it is just the fastest (The best way is to slot it, so there are only 2 nubs at the bottom on which it sits). If drilling, first, there must be enough holes, large enough that there will be no back pressure. Make sure the drill holes are perpendicular to the walls by drilling downwards at the equidistant center of the tube's sides each time. Roughly speaking the area of holes should be the area of the larger pipe.
Place the larger PVC over the inner PVC, making the bell siphon. Glue down the siphon so it is stable.
Test the siphon with plain water. To do so, place the boxes on top of each other, and run the pump, adjust the speed until the water fills the growbed, which then empties fully. If the siphon doesn't turn on, turn up the pump. If it stays full, or never turns off, then turn it down.
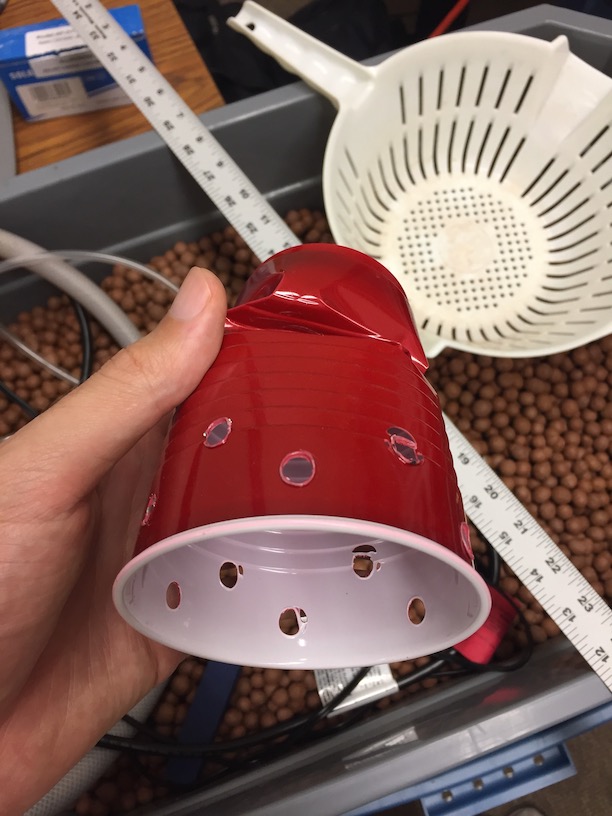
You might want to put an upsidedown plastic cup with holes cut into the bottom rim over the bell siphon to keep the
ceramic balls from closing the holes.
Fill the growbed with ceramic balls growth media. Make sure the grow media is ~1 inch or a few layers above the water
line to prevent algae. Insert the plants into the media. Finally, insert the tube coming out of the pump into the top
grow bed.

There are certain ratios you want to obtain between number of fish and number of plants (Source). Here are some tips on transplanting plants. Here are some guidelines about transplanting fish: You will want to do things like dechlorinate the water in the aquaponics system (have it sit out for at least 48 hours), as well as set the bag of fish in the water for a long time before opening it up to not shock the fish temperature-wise.
When your system is built and the fish and plants transplanted, you will have a working engineered ecosystem! Congratulations to your engineering skills, now sit back and relax and enjoy the fruits of your creation.