Getting the Right Temperature with Negative Feedback
Temperature is very important in an aquaponics system. The concept of keeping things in balance is fundamental to many Indigenous traditions: The Anishinaabe call it bimaadiziwin; the Navajo hózhó. If you had a temperature sensor, you could maintain balance by checking to see when it needs to be cooled, and turn on a fan:
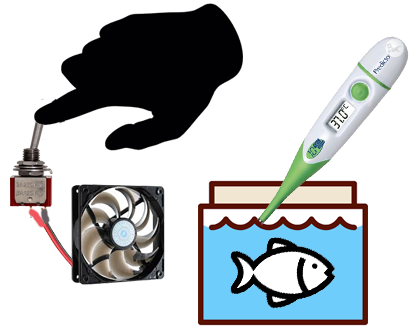
However that means you are constantly checking it. What if you could make the temperature sensor turn on the fan directly? Robotic aquaponics! That diagram looks like this:
In this experiment you will wire up a fan connected to a temperature sensor. The sensor is connected to a tiny computer called an “Arduino”. When the temperature rises past a certain “set point”, the arduino moves a switch called a “relay” and that turns on the fan.
The arduino code runs in a loop, constantly checking the temperature just like a human would (only it doesn't complain about getting bored). Each time through the loop, the code asks if your temperature is above some set point, like 84 degrees If it is, it will turn on the fan. If not, it turns it off.
Engineers call this "negative feedback" (the “negative” part is because of subtraction: “subtract the real temperature from the set point to see if it is too high or low”). Living things have many kinds of negative feedback to keep the body in balance. Hold your breath and you will find yourself breathing rapidly afterwards. Start exercising and you will find your heart beating faster. In biology negative feedback is called "homeostasis" (homeo = similar, stasis = staying at a value). The body's set point values are where the organism operates at peak performance. We have sensory neurons to detect temperature, pressure, and other physical stimuli. And we have “effectors” that respond: shivering when cold, sweating when hot. Long before humans invented negative feedback, nature was already using it. In your circuit you will have an electronic sensor for temperature, and an electronic effector: the fan.
Temperature is not the only parameter that nature tries to keep in balance. In a natural ecosystem, fish waste is transformed by the microorganisms in plant roots, turning ammonia into nitrate, and gets taken up by plants. Food availability is another: when there are too many of one species, there is usually an increase in the number of their predators. In our artificial ecosystems -- aquaponics-- we have to play the role of nature, keeping things like nitrates and fish food in careful balance. So when we have a chance to let machines do some of the work, it's a great opportunity. Lets see how that works for temperature.
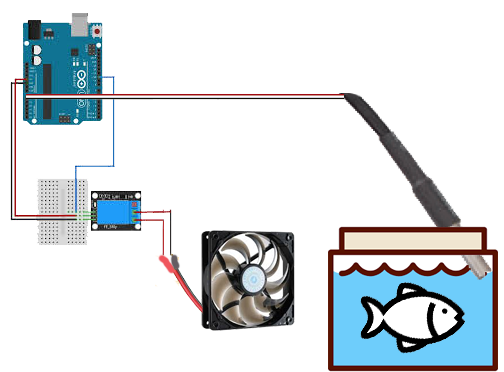
In this experiment we will start with creating a miniature mechanical feedback model using our arduino and fan and temperature sensor. The diagram for what we're building is below. After installing the Arduino software (online for free) you will need the following:
Arduino with USB cable, protoboard, 4.7K resistor, DS18B20 temperature sensor, jumper wires, 5v relay module, DC cooling fan.
If you want a little more background on electronics, you can get some protoboard basics here.
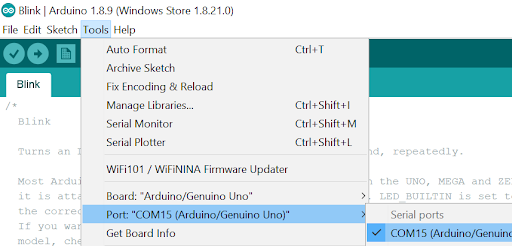
- Connect your Arduino, via USB cable, to a laptop. Check to make sure the right com port is selected (see image at right).
- Load the “blink” program from File>Examples>Basics>Blink
- Upload Blink to your computer (click on right-pointing arrow below the “edit” menu)
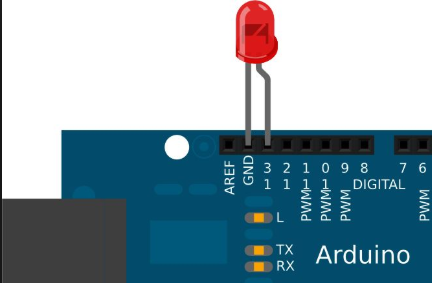
- You should be able to see the built-in LED blinking, near pin 13. If you insert an LED into pin 13 (short lead to GND, long lead to 13) it will light up!
- In the code, you will see :
digitalWrite(LED_BUILTIN, HIGH)delay(1000);digitalWrite(LED_BUILTIN, LOW);delay(1000);
If you change those values from 1000 to 100, and then upload again, you will see the on or off cycle change. 1000 miliseconds = 1 second. Congrats, you have modified your first Arduino code!
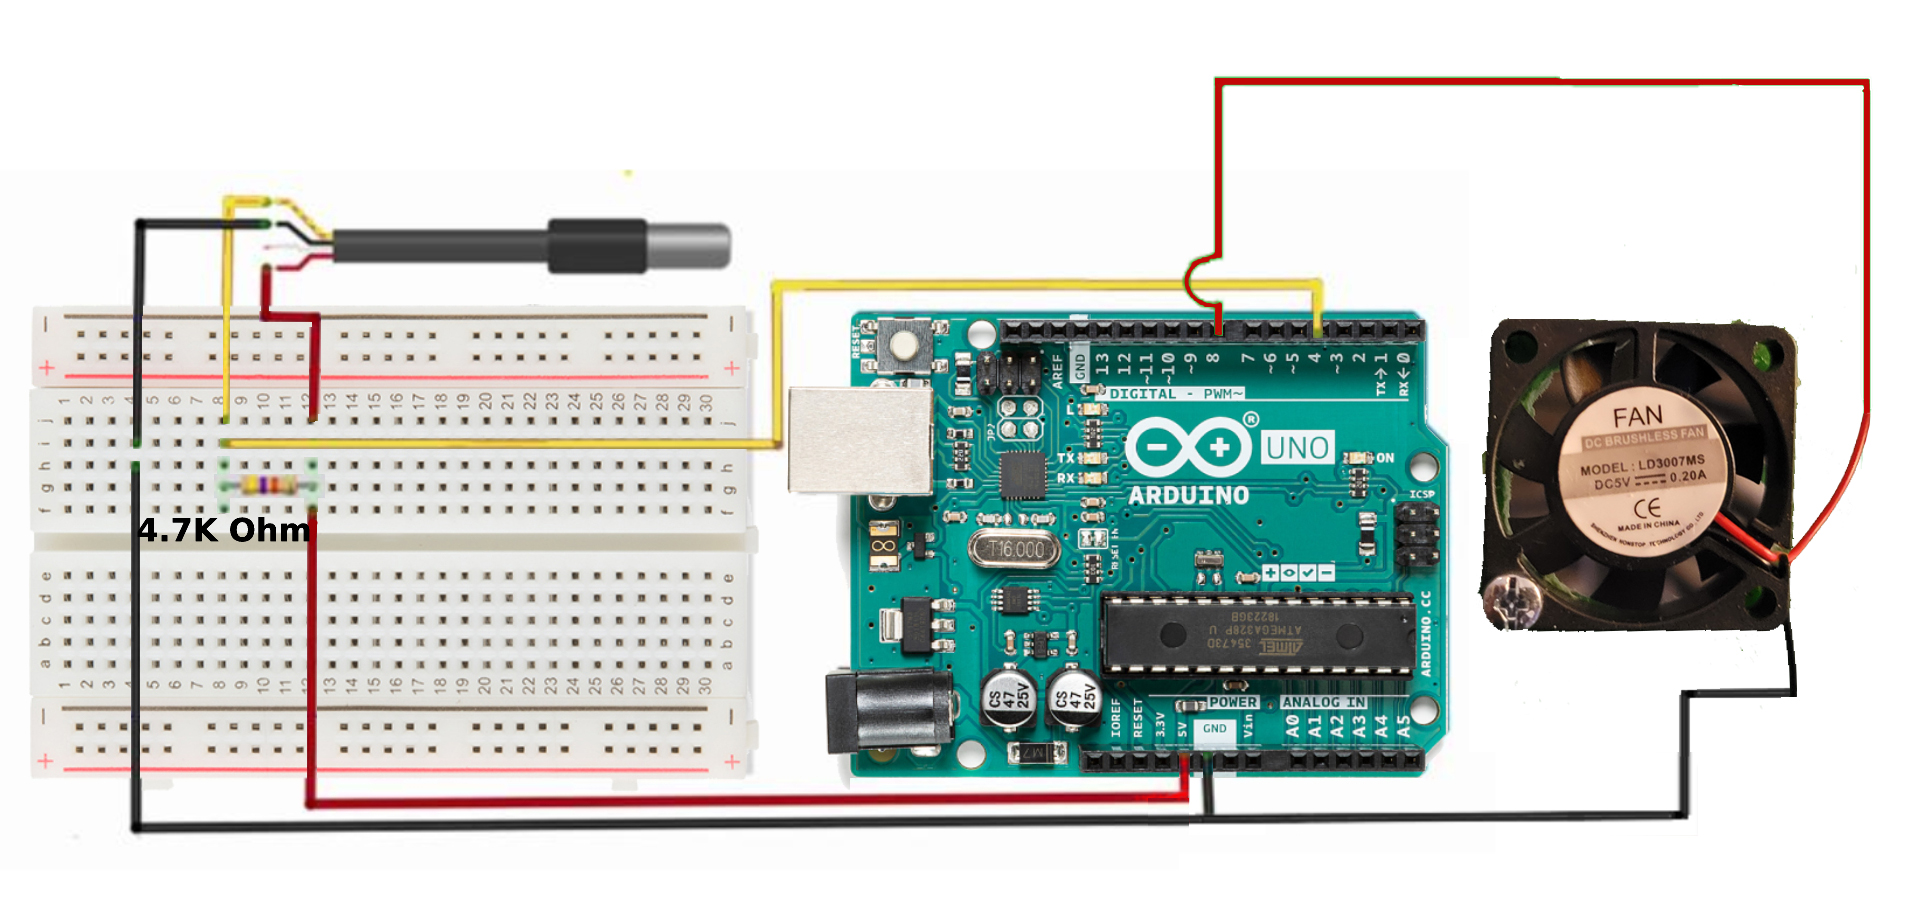
Now on to detecting temperature. Add the jumper wires, sensor, and resistor to the Arduino as shown below. The factories where these sensors are made occasionally switch black and red, so if it is not working, try swapping those.
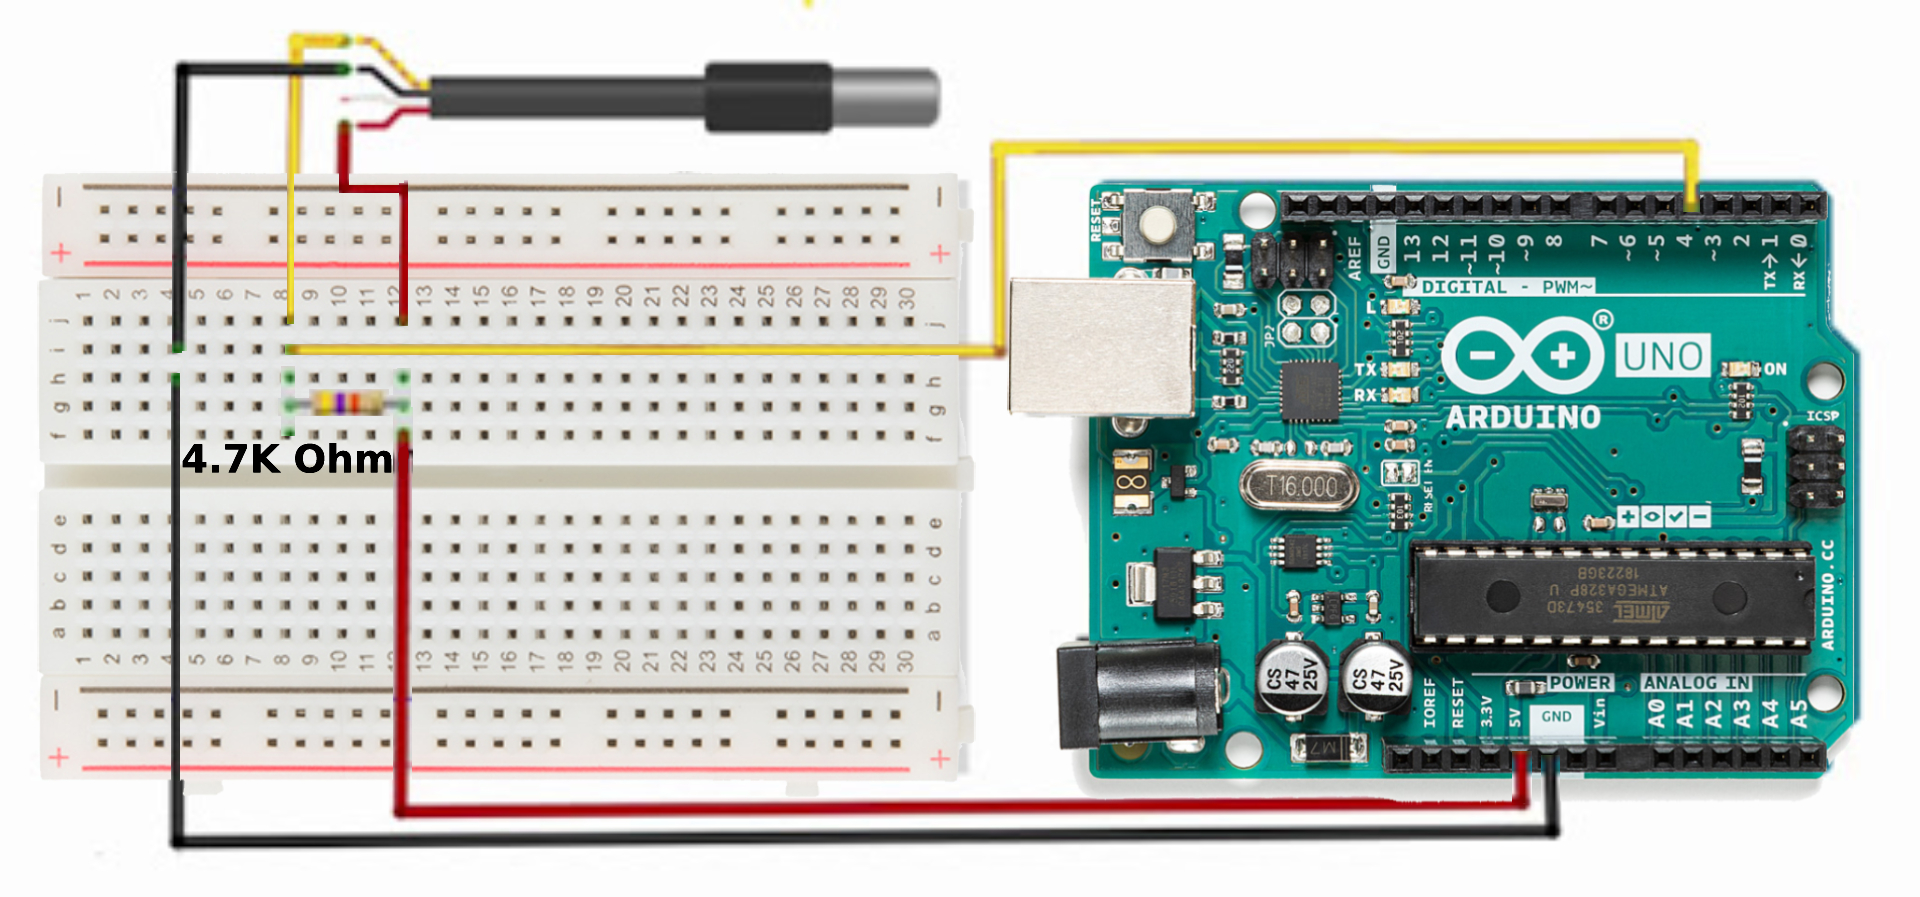
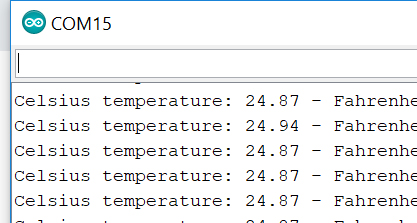
In the Arduino software, you will need to have the “One wire” and “Dallas Temperature” libraries installed. You can then use the sketch here just like you used “blink”. More information is available here. Once all that is connected, you can open the serial monitor and a window should pop up to display the temperature.
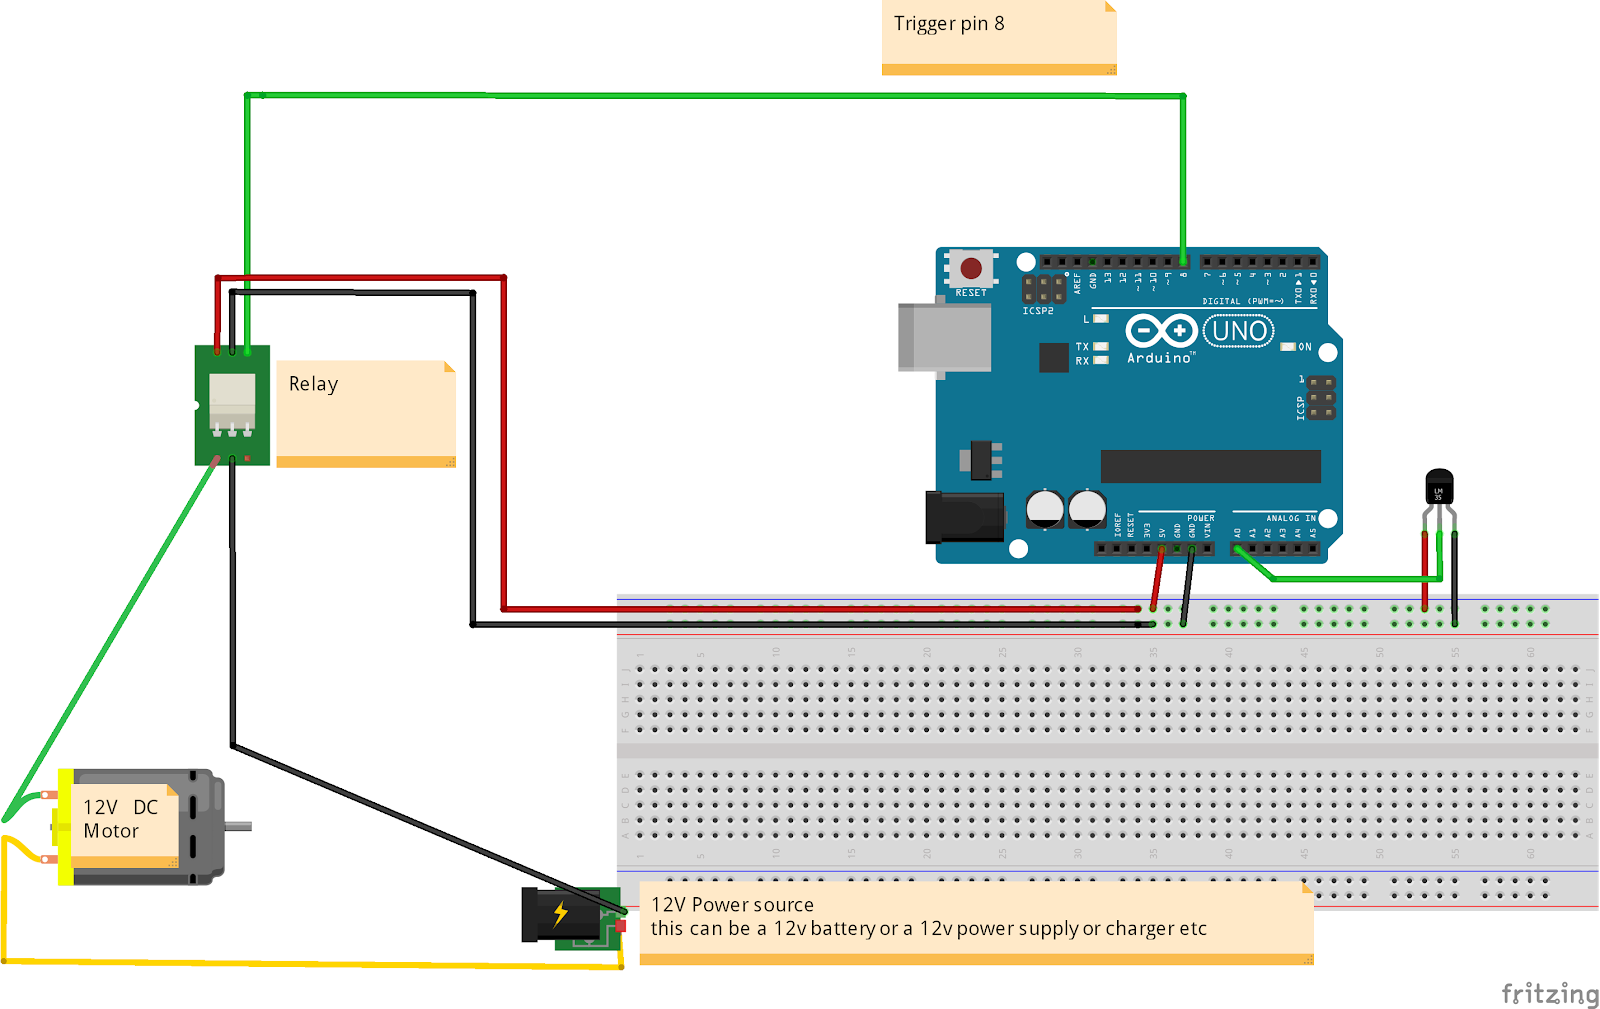
Now for the output. You can modify the code you have yourself, or upload this one. It sets off the LED at pin 8 when the temperature is more than 79 degrees.
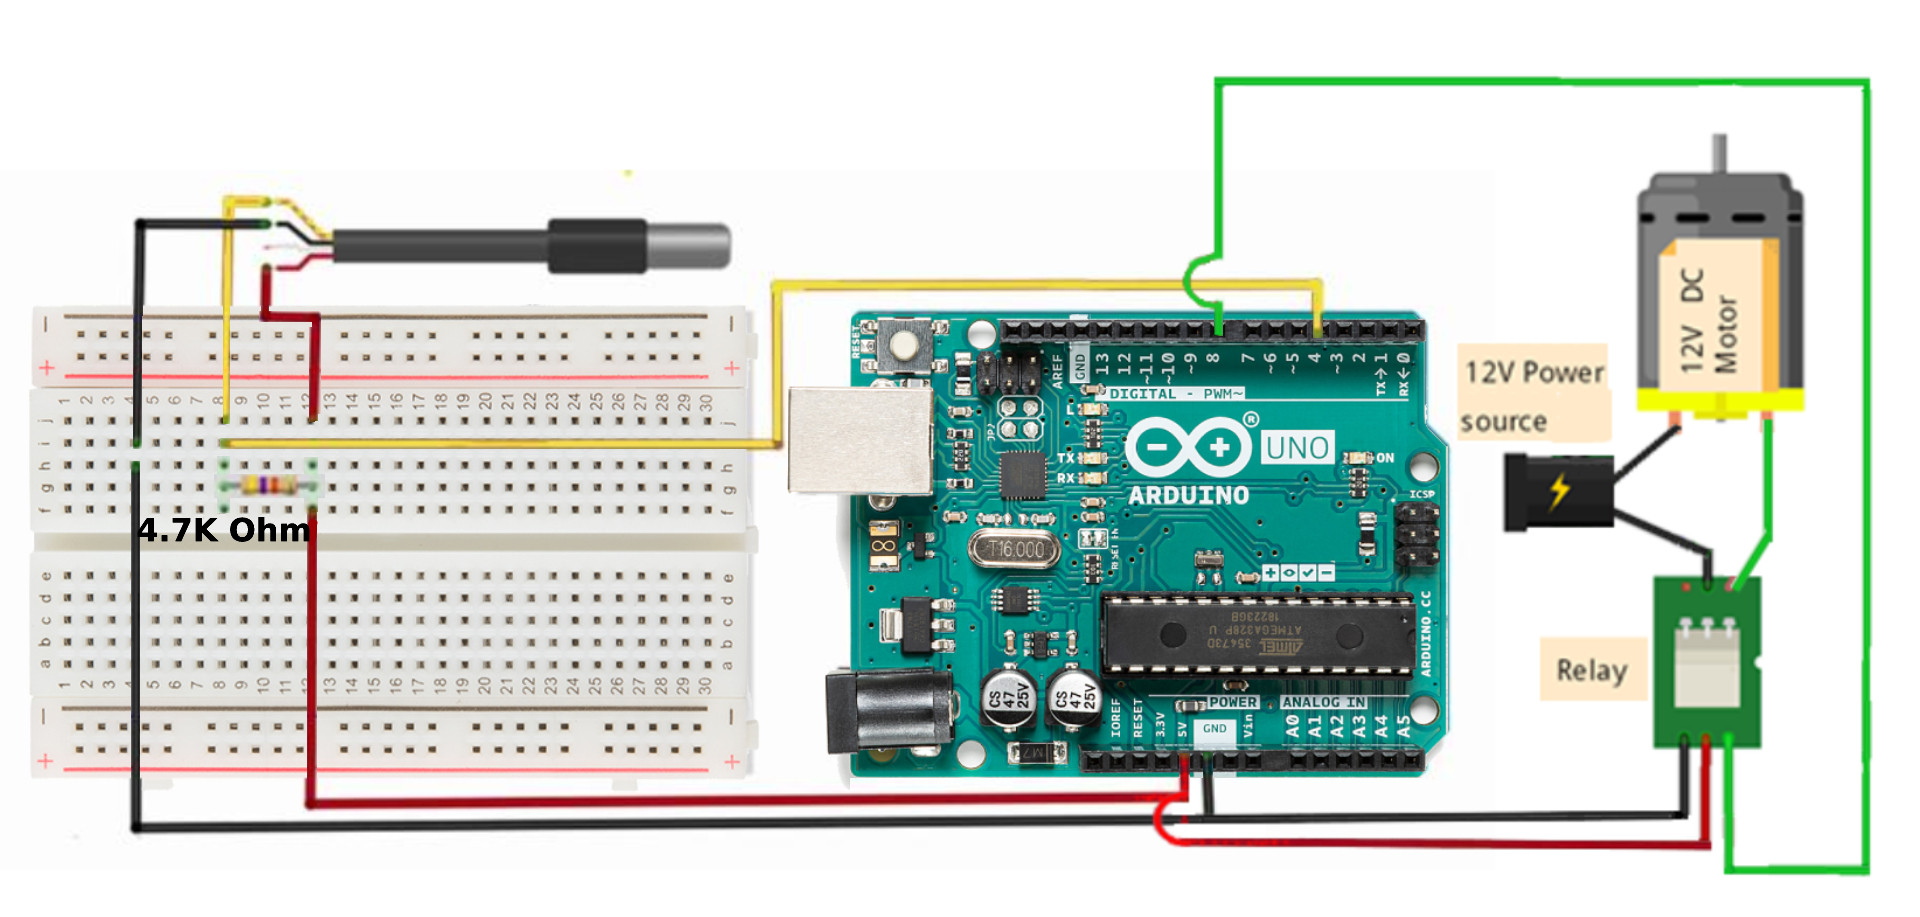
So far so good! Now we can close the loop by setting off the fan instead of the LED. If you have a tiny 5 volt fan, you can connect it directly to the arduino, as shown below. If you have a big fan that requires 12 volts, you will need to have the Arduino flip an electronic switch, called a relay. It is the relay that makes the fan turn on. The circuit is shown below the 5 volt version. Since the software does not care whether it is driving an LED, a 5 volt fan, or a relay, we can leave it exactly the same.
Finally, we should note that there is more than one temperature sensor in the world. Below is an alternative circuit using the TMP36: