Casting Adinkra in Pewter
3D printing is not only useful for making plastic models. With mold-making, we can physically render those exact same shapes in a whole host of new materials such as wax, resin, or metal.
Pewter, a tin-antimony alloy, is a popular choice for making metals casts, and is frequently used as a material for making jewelry, tokens, and sculptures. Its relatively low melting point allows it to be cast more easily than other metals and makes it possible to clean up the final product using hand tools.
Click here for a more detailed breakdown on casting Adinkra in pewter.
Step 1: Gather Materials
Molding
- 3D-Printed Adinkra Shapes
- Alumilite Amazing Mold Putty
Casting
- Lead-free Pewter (98% tin, 2% antimony)
- Casting Furnace
- Casting Ladle
- Baking Tray
- Grilling Tongs
- Particle Board or Plywood
- Metal Files
Safety Equipment
- Heat-Resitant Furnace/Welding Gloves
- Leather Apron
- Face Shield
- Safety Glasses
The casting furnace used in the making of this guide is the Do-It Molds Hot Pot-2, which is a portable option with a handle and spout for pouring metal directly from the unit. However, other casting furnaces remain stationary on the table and allow you to scoop out the metal with a specialized scoop called a casting ladle. The ladle can also be used with the Hot Pot for smaller precise pours.
Step 2: Create Your Adinkra Shape
Head to the software and create your Adinkra. We reccomend using the Carving Adinkra tool for pewter casts.
Tip: Make sure that your Pen Size is set to a relatively high value so your cast isn't capable of bending easily.

Step 3: 3D Print your Design
Once you are finished with your design, you are ready to 3D print it! Click here to see how to do this.
Step 4: Create the Mold
Set up your mold, following your putty's instructions. Once that begins to harden, place your 3D Adinkra print into the mold. Leave the print in the mold, allowing it to cure for 20 minutes or putty reaches the consistency of hard rubber. Once that is finished, take out the 3D print.
Step 5: Prepping the Pewter
Start up your casting furnace and allow it to heat up. With a gloved hand, place a pewter ingot in the center of the bowl and allow it to melt.
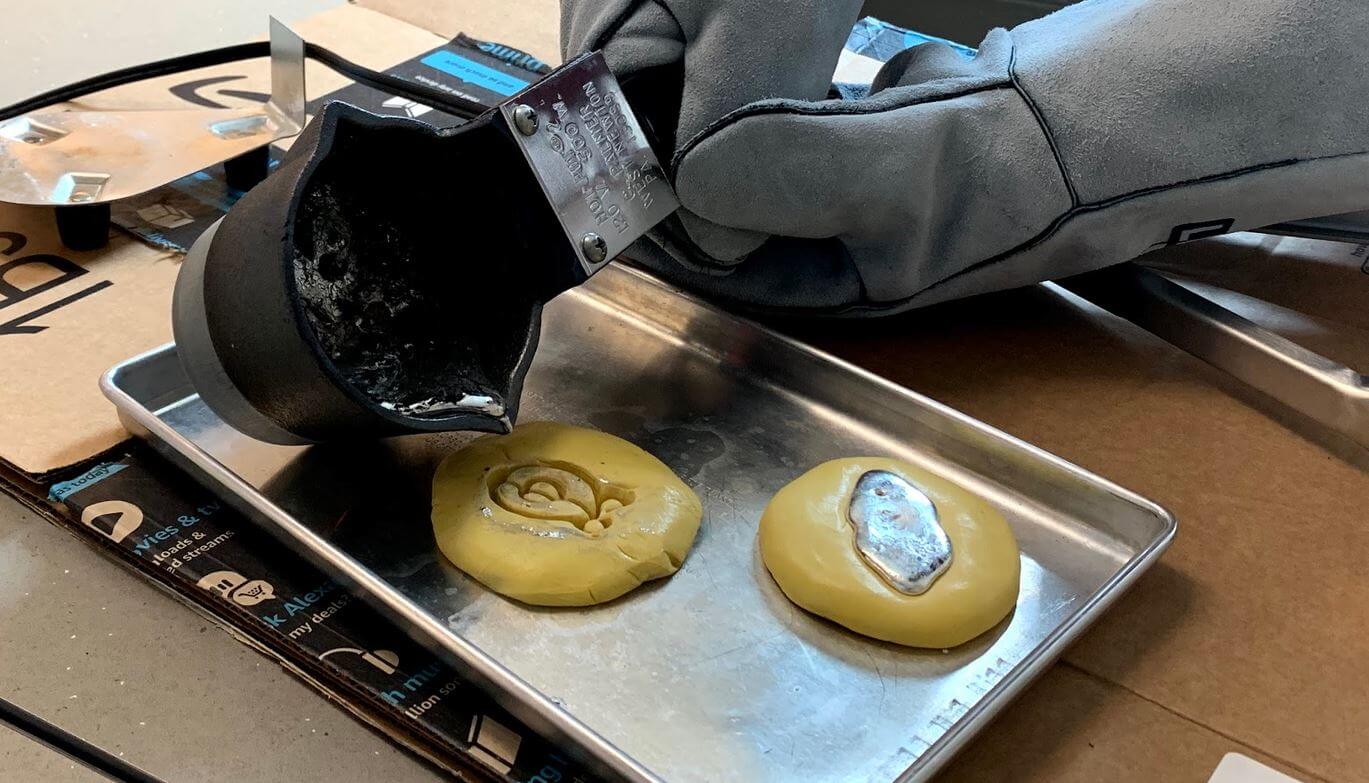
Step 5: Casting
With the pewter melted, go ahead and pour the pewter into your mold, keeping in mind all the safety procedures on this page and in the PDF. Once you are finished pouring, allow it to harden completely. When it has cooled, go ahead and take it out of the mold. You can now clean it up with a metal file or other tools at your disposal. Congrats, you casted your Adinkra in pewter!

Setup and Safety
Before beginning to cast, be sure to pick a suitable location and set up your space with consideration to your surroundings. Choose an open or well-ventilated area and provide adequate protection for any nearby surfaces. It's recommended that you provide a thick, flat piece of particle board or plywood to protect your table, if necessary. Additionally, be especially careful to secure power cords attached to your casting furnace that could be tugged or tripped over, as this could create a sizable safety hazard if hot metal splashes out of the pot. Ensure flammable materials are kept well away from the work area.
Use extreme caution when heating and working with molten metal. Exposure to high-temperature materials in this activity carries with it significant risk of harm and/or damage to clothing and personal property if not handled with care. Those performing the pewter casting should be provided adequate protection for their personal safety, including a face shield, safety glasses, a leather apron, and heat-resistant gloves. Long sleeves, long pants, and closed-toed shoes are also highly recommended.
Onlookers should be standing a safe distance away and wearing appropriate clothing. In the case of spillage, synthetic fibers may melt on contact with molten metal and adhere to skin. Make sure all the components are dry as excess water hat comes into contact with hot surfaces could produce steam, causing molten pewter to splash uncontrollably.
Make sure that your molds are completely dry! Any water will cause the pewter to bubble up, causing splashing.